TM 9-1240-271-34&P
PLATE ASSEMBLY ASSEMBLY
TOOLS: 1/4", 3/8", 1/8" flat tip screwdriver
1/8" drive pin punch -
4 oz. ball peen hammer
Soft face hammer
Retaining ring pliers (external tip .023, bent tip .022)
5/32" socket head screw key (Allen wrench or equivalent)
1/4" open end wrench
Aircraft and instrument grease (item 1, App. A)
SUPPLIES:
PERSONNEL: One
REFERENCES: JPG 41 C for lubricaton
EQUIPMENT CONDITION: Plate assembly on work bench
FRAME 1
--
Procedure
Step
1.
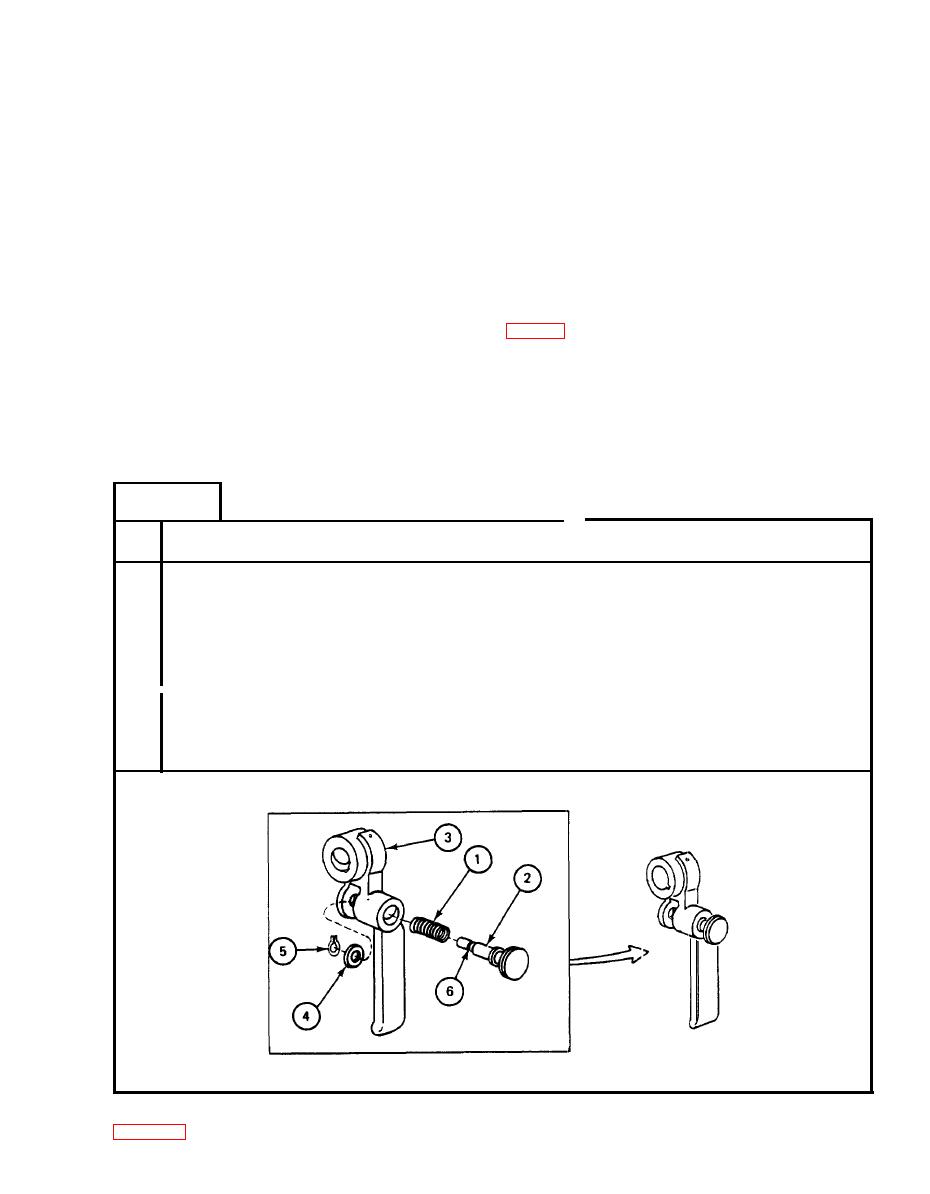
Spread a small amount of grease on spring (1), plunger (2), and to mounting hole in
handle (3) (JPG).
Put spring (1) on plunger (2) and place part way into lever handle (3).
2.
Put washer (4) on end of plunger (2). Using finger, put enough pressure on plunger (2)
3.
to expose plunger (2).
4.
Using bent tip pliers put retaining ring (5) on plunger groove (6). Release pressure on
plunger (2).
GO TO FRAME 2
Vol II


