
TM 9-1240-400-34&P
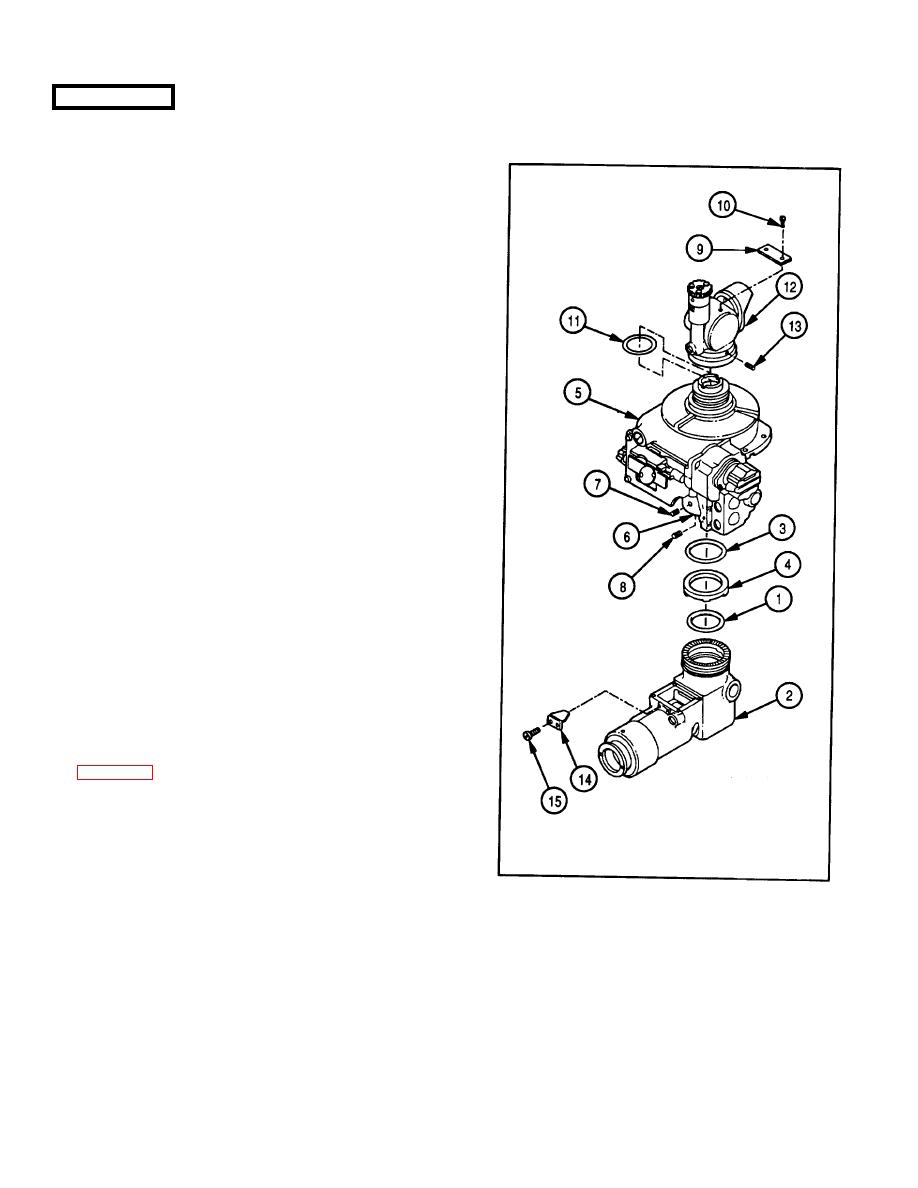
REASSEMBLY
12 Install stop (14) and two screws (15).
1
Apply a coat of silicone compound (item 11, appx C)
to new preformed packing (1), and install new
preformed packing (1) in groove in elbow assembly
(2).
2
Install spring tension washer (3) and positive clutch
half (4) on body assembly (5)
Make sure pins
in body assembly (5) aline with holes in positive
clutch half (4).
3
Install elbow assembly (2) on body assembly (5).
4
Turn collar (6) clockwise until snug.
5
Apply sealing compound (item 10, appx C) to
threads of three setscrews (7) and setscrew (8).
6
Install three set screws (7) and setscrew (8) in body
assembly (5).
7
Install identification plate (9) and two screws (10).
8
Apply a coat of silicone compound (item 11, appx C)
to new preformed packing (11).
9
Install new preformed packing (11) and head
assembly (12) to body assembly (5) Using
adapter, torque to 80.00 in.-lb (9.04 N-m)
Refer to
10 Apply sealing compound (item 10, appx C) to
threads of three setscrews (13).
11 Install three setscrews (13) in head assembly (12).
2-21
