
TM 9-1240-382-34
LOCATION
ITEM
REMARKS
ACTION
DISASSEMBLY
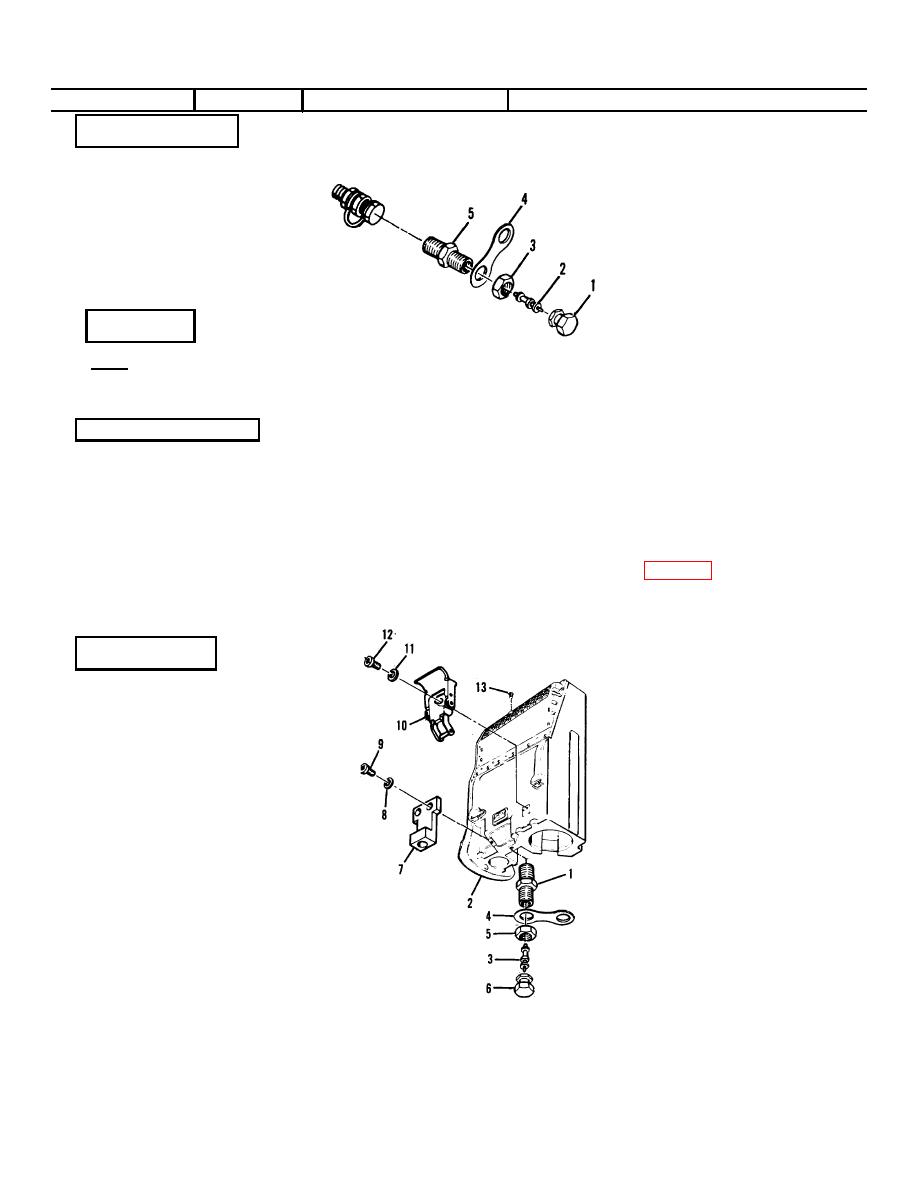
Remove the cap (1), valve core (2),
nut (3), and strap (4) from valve
Head
Purging Valve
stem (5). Detach the strap (4) from
Assembly
the cap (1).
Cap (1)
Core (2)
Clean dirt and grime from all
Nut (3)
threads. Clean all traces of sealing,
Strap (4)
compound
from
stem
and
Stem (5)
mounting hole.
CLEANING
Inspect all parts for deterioration.
Head
Purging Screw,
Pay particular attention to the valve
Assembly
Latch, Bracket,
core; ensure that it operates
Purging Valve
smoothly and is free of corrosion.
Inspect the cap and stem for worn
INSPECTION/REPAIR
or damaged threads. Inspect the
strap for tears and check that it
Head
Purging Screw,
holds the cap securely. Repair is
Assembly
Latch, Bracket,
limited to replacement of missing,
Purging Valve
defective, or damaged parts.
Apply sealing compound MIL-S-
11031 (App B) to threads of valve
stem (1) and install the stem in
head assembly (2). Install valve
core (3) in stem (1). Install strap (4)
on stem (1) and secure with nut
REASSEMBLY
(5). Attach cap (6) to strap (4) and
thread cap onto valve stem. Install
Head
Purging Valve,
bracket (7) and secure with
Assembly
Bracket, Latch,
lockwashers (8) and screws (9).
Purging Screw
Install latch (10) and secure with
lockwashers (11) and screws (12).
Install the purging screw (13) in the
Stem (1)
head assembly (2).
Head Assembly (2)
Core (3)
Strap (4)
Nut (5)
Cap (6)
Bracket (7)
Lockwasher (8)
Screw (9)
Latch (10)
Lockwasher (11)
Screw (12)
Purging Screw (13)
2-27
