TM 9-1240-400-34&P
2-13.
MAINTENANCE OF OPTICAL INSTRUMENT WORM ASSEMBLY, OPTICAL INSTRU- MENT COLLECTIVE
CELL ASSEMBLY, OPTICAL INSTRUMENT OBJECTIVE CELL ASSEMBLY, AND RETICLE ASSEMBLY
(CONT).
REASSEMBL Y/INSTALLA TION (CONT)
NOTE
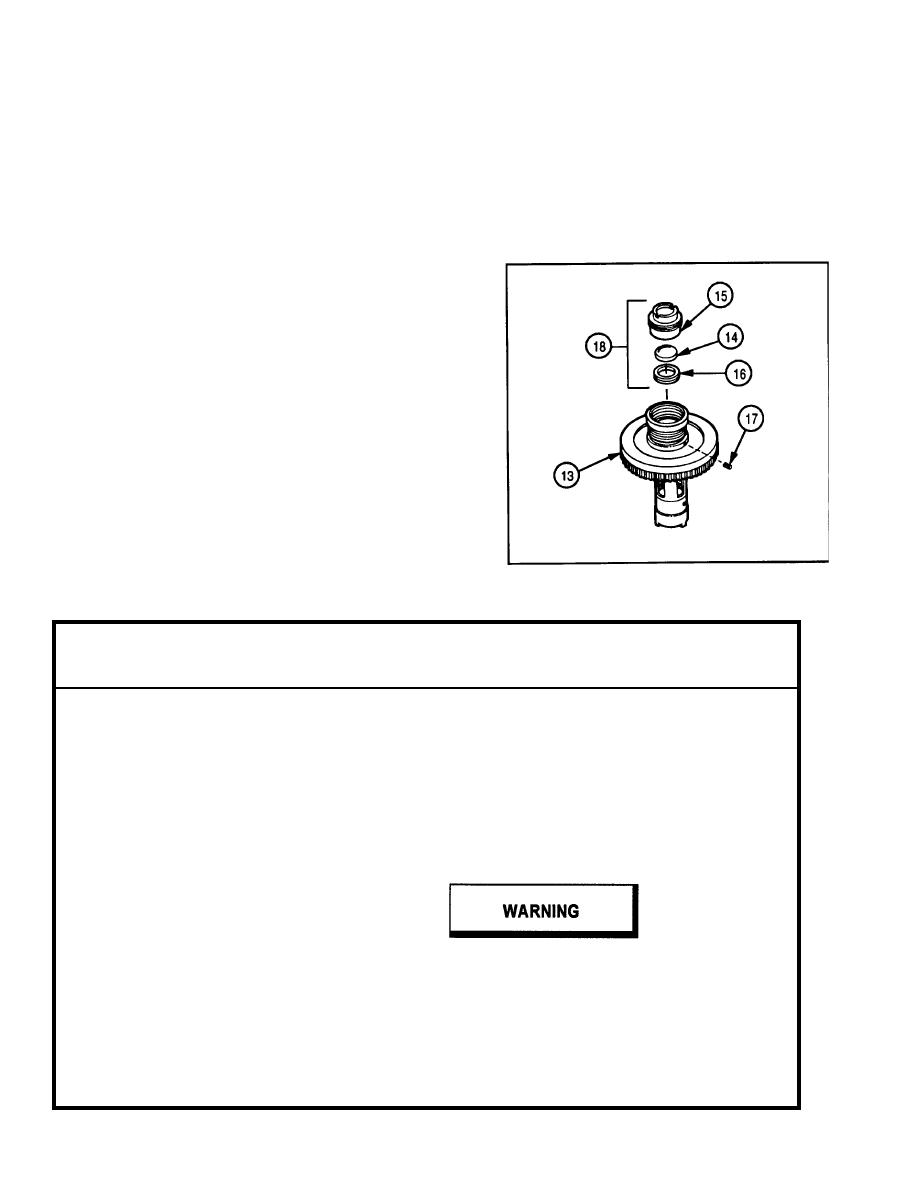
Steps 12 thru 14 are written and illustrated for reassembly of cell assembly (8587297).
12 Install lens (14) in optical element cell (15).
13 Apply small amount of sealing compound (item 10,
appx C) to cell (16) in three places.
14 Install cell (16) in optical element cell (15).
15 Apply sealing compound (item 10, appx C) to
threads of setscrew (17).
16 Install cell assembly (18) and setscrew (17) in gear
(13) using tubular spanner wrench (7597648).
2-14.
MAINTENANCE OF ADAPTER ASSEMBLY AND COUNTER ASSEMBLY.
This task covers:
a. Removal/ Disassembly
c.
Repair
b.
d.
Reassembly/Installation
INITIAL SETUP:
Reference
Tools and Special Tools
TM 9-254
Tool kit, electronic: system maintenance
(SC 5180-95-CL-B29)
Equipment Conditions
Tubular spanner wrench, 11/16 and 45/64
2-28 Adapter assembly removed
(7597638)
General Safety Instructions
Materials/Parts
Adhesive sealant (item 5, appx C)
Aircraft grease (item 7, appx C)
Lockwasher (MS35338-134)
Lockwasher (7) (MS35338-135)
Lockwasher (2) (MS35338-136)
Use adhesives, cleaning solvents,
Sealing compound (item 10, appx C)
and sealing compounds in well-
Solder (item 12, appx C)
ventilated area away from open
flame. Adhesives, cleaning sol-
vents, and sealing compounds are
harmful to skin and clothing, can
burn easily, and may give off
harmful vapor.
2-42


