TM 9-1240-382-34
LOCATION
ITEM
REMARKS
ACTION
INSPECTION/REPAIR
Inspect
all
parts
for
deterioration. Check screws for
Elbow
Purging Screw,
worn or damaged threads.
Assembly
Latch, Reticle
Check
contact
(11)
and
Lamp and
lampholder (2) for corrosion.
Contact
Check ear (8) on lampholder for
bent condition, or missing part.
Repair is limited to replacement
of
missing,
defective,
or
damaged parts.
INSTALLATION
Install
Packing
(1)
on
Elbow
Purging Screw,
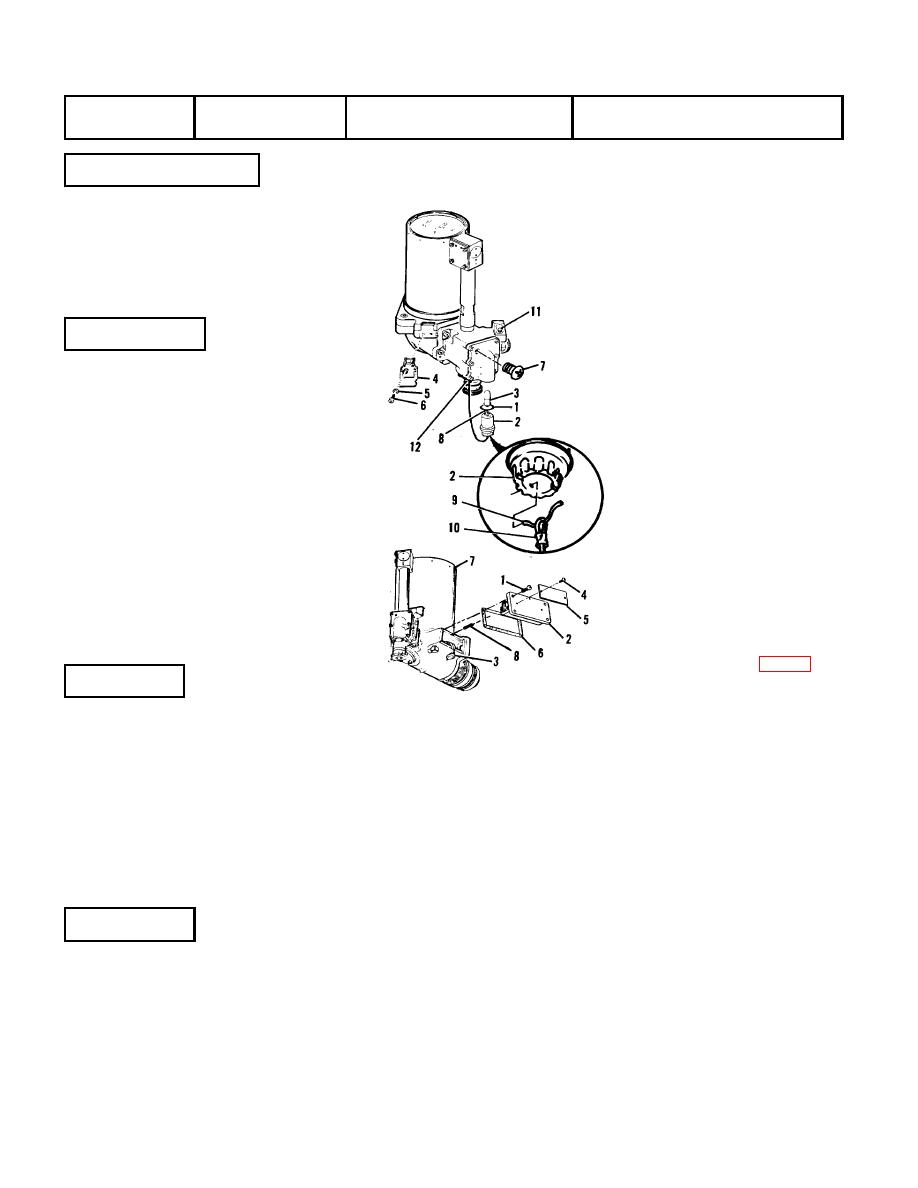
lampholder (2).Install lamp (3)
Assembly
Latch, Reticle
in bayonet base of lampholder
Lamp, Cable,
(2).
Install lampholder in
and Lampholder
housing. Install latch (4) and
secure with lockwashers (5)
Packing (1)
and screws (6). Install purging
Lampholder (2)
screw (7). Insert the attaching
Lamp (3)
screw (12) through the terminal
Latch (4)
lug in one end of the cable (10).
Lockwasher (5)
Install the attaching screw.
Screw (6)
Insert the locking wire through
Purging Screw (7)
the terminal lug in the opposite
Lampholder Ear (8)
end of the cable (10) and install
Locking wire (9)
the locking wire (9) in the
Cable (10)
lampholder (2).
Contact (11)
Screw (12)
If troubleshooting (p 2-2, 4b)
has indicated that the regulator
REMOVAL
requires replacement, remove
four screws (1). Pull the
Elbow
Regulator,
regulator assembly (2) and pin
Assembly
Identification
(8) out carefully and unplug
Plate
electrical
connector
(3).
Screw (1)
Remove two screws (4) and
Regulator (2)
identification plate (5). Remove
Electrical Connector (3)
gasket (6).
Screw (4)
Clean dirt and grime from all
Identification Plate (5)
threads. Clean the areas on the
Gasket (6)
elbow
(7)
and
regulator
Elbow (7)
assembly (2) that will contact
Pin (8)
the gasket (6) when it is
CLEANING
installed.
Elbow
Regulator
Assembly
2-11


