TM 9-1240-400-34&P
13
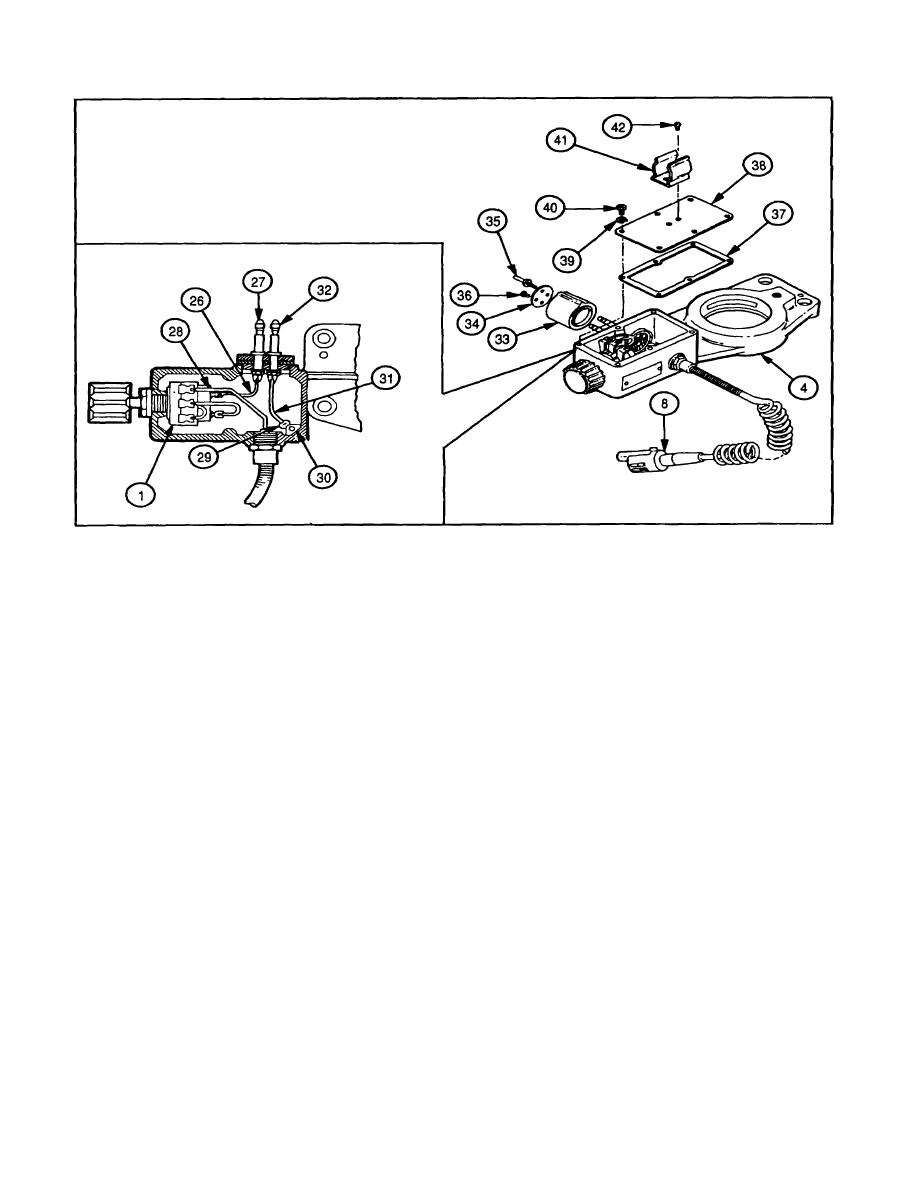
Using solder (item 12, appx C), and soldering flux (item 6, appx C), solder black wire (26) to positive (+) contact (27)
and terminal lug (28) on variable resistor (1). Trim to fit.
14
Install terminal lug (29) and screw (30).
15
Using solder (item 12, appx C), and soldering flux (item 6, appx C), solder white wire (31) to negative (-) contact (32)
and terminal lug (29). Trim to fit.
16
Apply sealing compound (item 10, appx C) to shell receptacle (33).
17
Install shell receptacle (33), electrical plate (34), headless shoulder pin (35), and screw (36) on bracket (4).
18
Apply adhesive (item 1, appx C) to new gasket (37).
19
Install new gasket (37), cover (38), six new lockwashers (39), and six screws (40) on bracket (4).
20
If removed, install spring tension clip (41) and two screws (42) on cover (38).
21
Install instrument light (8) in spring tension clip (41).
4-19


