
TM 9-1240-400-34&P
4
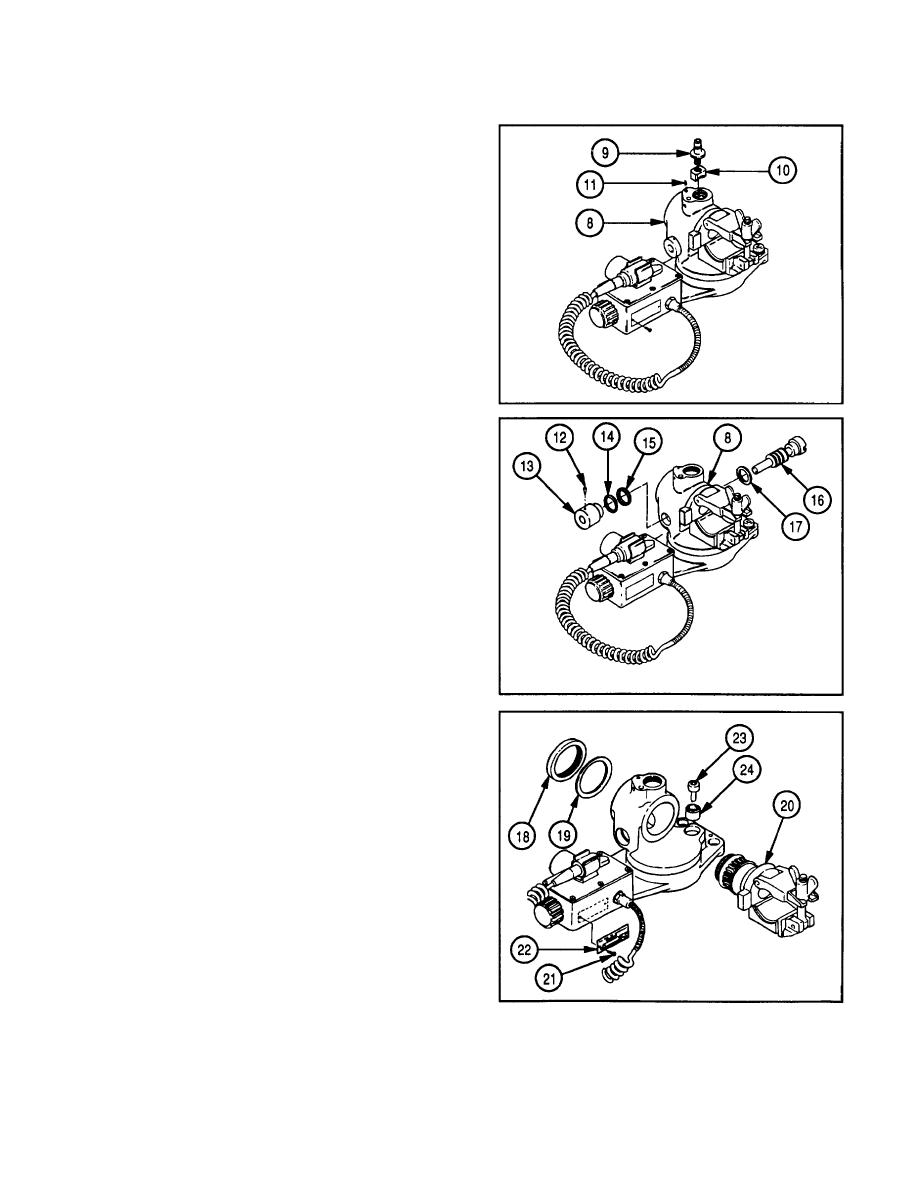
Remove shaft (9) and receptacle (10) from adapter
(8).
5
Remove pin (11) only if damaged.
6
Remove tapered pin (12), collar (13), spacer (14),
and shim (15), if present.
7
Remove worm shaft (16) and spacer (17) from
adapter (8) by turning worm shaft (16)
counterclockwise.
8
Using adjustable spanner wrench, remove plain
round nut (18), shim (19), and support assembly
(20).
9
Remove two screws (21) and identification plate
(22).
10
Remove and discard self-locking screw (23) and
control cam (24).
4-7
