
TM 9-1240-401-34&P
10 If removed, install two springs (24) and two shoul-
dered pins (23) in rear housing (14). Secure in
place with two flat washers (22) and two new cotter
pins (21),
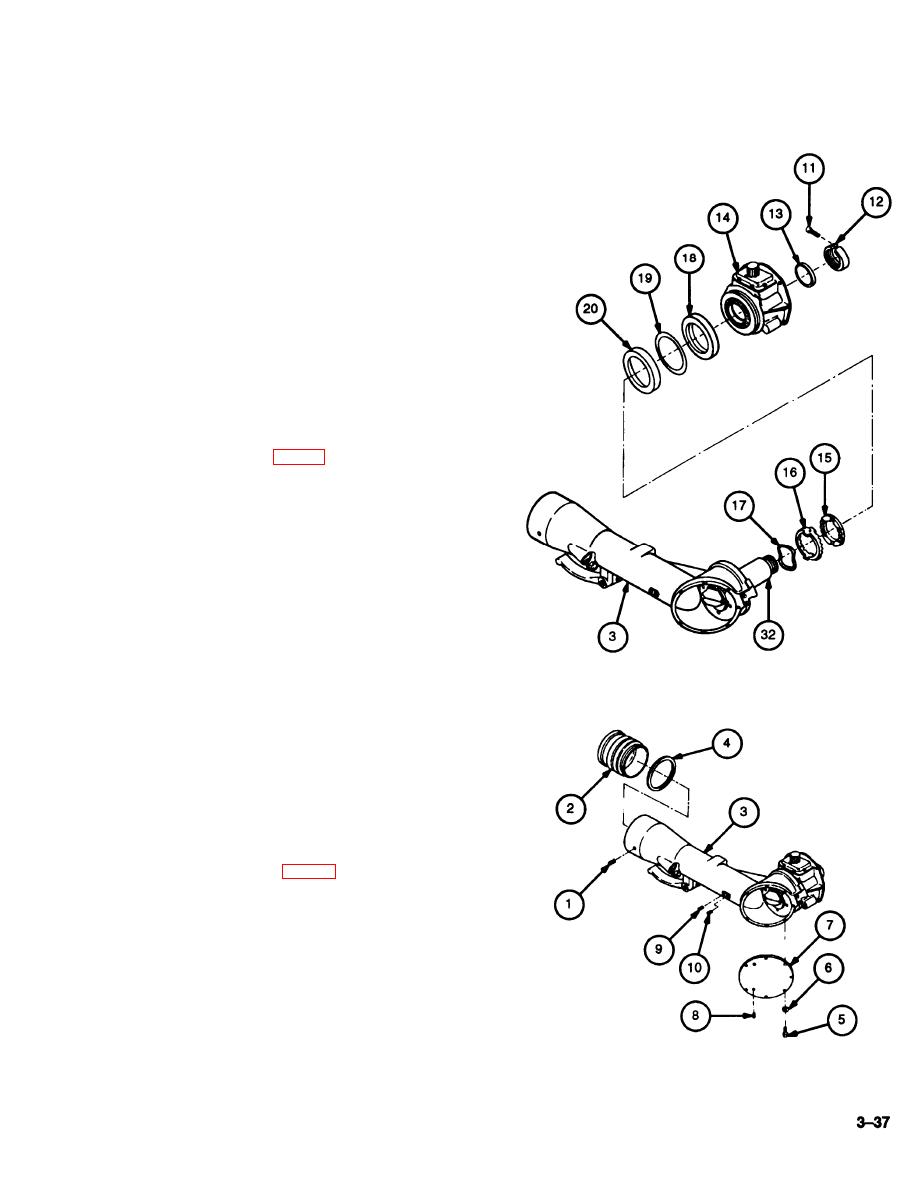
11 Install seal (18) on eyepiece arm (3) with brass ring
of seal facing away from new shim (19).
12 Install protective cup (20), shim (19), and seal (18)
on eyepiece arm (3).
13 Install spring washer (17) and shuttle (16) over cell
housing (32) and onto eyepiece arm (3).
14 Install arm ratchet (15) over cell housing (32) and
engage with shuttle (16).
15 Apply grease (item 6, appx B) to unthreaded sec-
tion of cell housing (32).
16 Install rear housing (14) over cell housing (32) so
that arm ratchet (15) engages with housing.
17 Install ring spacer (13) and nut (12) on threaded
section of cell housing (32).
18 Install cap screw (11) in nut (12).
19 Install prism cover (7) on eyepiece arm (3) being
careful not to damage optical instrument prism.
20 Install six new Iockwashers (6) and six machine
screws (5).
21 If removed, install three setscrews (8).
22 Install setscrews (9 and 10). Do not tighten.
23 Apply grease (item 7, appx B) to new preformed
packing (4) and install on cell assembly (2).
24 Using 2-9/16 and 237/64 inch tubular spanner
wrench, install cell assembly (2) in eyepiece arm
(3) until seated.
25 Back out cell assembly (2) two complete turns.
26 Install two setscrews (1) in eyepiece arm (3) to se-
cure cell assembly (2).
